
The toe of a cricket bat endures immense stress. At the blade’s lowest point, it absorbs the impact of toe-end yorkers, scrapes along damp pitch surfaces when tapping crease lines, and bears the brunt of moisture transfer when standing upright on wet grass.
When a crack forms across the toe, immediate structural repair is critical. Left unaddressed, vibration forces and moisture ingress will rapidly turn a minor hairline fracture into a complete horizontal split or vertical delamination, rendering a premium English Willow blade unusable.
This step-by-step master guide outlines everything you need to know about diagnosing, repairing, reinforcing, and maintaining a cracked cricket bat toe at a professional standard.
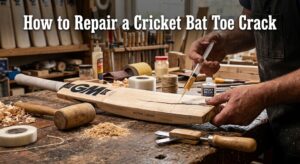
Triage: Assessing the Damage
Before purchasing materials or applying adhesive, you must determine whether the damage is cosmetic, structurally repairable, or catastrophic.
1. Surface Feathering & Feather-Cracks
-
Characteristics: Fine, shallow cracks running along the vertical grain face at the absolute base.
-
Diagnosis: The wood does not open or flex when manually squeezed or pulled.
-
Action: Low severity. Requires light sanding, localized oiling, and protective toe guard application.
2. Horizontal or Vertical Through-Splits (Repairable Zone)
-
Characteristics: Visible separation traversing either across the face (horizontal) or following the grain lines up into the lower swell (vertical).
-
Diagnosis: The crack visibly opens and closes when light pressure is applied to the toe.
-
Action: Moderate to high severity. Requires deep adhesive penetration, mechanical clamping, internal reinforcement (binders or dowels), and surface sealing.
3. Dry Rot & Severe Structural Fracture
-
Characteristics: The toe wood is spongy, soft, or crumbly due to prolonged water exposure, or the split extends beyond 4 inches up the blade body alongside multiple splintering fractures.
-
Diagnosis: Missing chunks of willow larger than 1.5 inches or compromised structural integrity across the primary hitting zone.
-
Action: Severe. Professional re-toeing (cutting away the damaged section and grafting new English Willow) or total replacement is required.
Required Tools & Materials
To perform a durable, high-strength repair, gather the following specialist workshop items:
| Category | Recommended Items | Purpose |
| Adhesives | Waterproof PVA Wood Glue (e.g., Titebond II/III) or 2-Part Slow-Curing Epoxy | Deep fiber bonding with sufficient elasticity. (Avoid Cyanoacrylate/Superglue as it cures too brittle). |
| Clamping Equipment | 2x Parallel Bar Clamps or C-Clamps, Protective Wooden Shims | Equalizing pressure without bruising soft willow. |
| Reinforcement | Fiberglass Edge Tape, Wooden Dowels (3mm-4mm, optional for deep splits) | Preventing lateral sheer and securing internal cracks. |
| Abrasives | Silicon Carbide Sandpaper (P80, P120, P240, and P400 grits) | Wood preparation and flush finishing. |
| Finishing & Protection | Raw Linseed Oil, Heavy-Duty Rubber Toe Guard, Contact Adhesive | Sealing against moisture ingress and direct turf impact. |
| Precision Tools | Fine-tipped syringe, toothpicks, isopropyl alcohol, masking tape | Clean application and surface degreasing. |
Step-by-Step Toe Repair Process
Step 1: Drying and Decontamination
The single most common cause of glue failure in toe repairs is moisture trapped deep inside the timber fibers.
-
Remove Old Covers: Strip off any existing anti-scuff sheets, edge tape, or broken toe guards. Clean off old adhesive residue using isopropyl alcohol or acetone.
-
Moisture Extraction: If the bat was used on damp ground, stand it upright in a dry, room-temperature environment for 48 hours before starting work. Never use direct heat guns, hair dryers, or radiators, as extreme heat rapidly warps English Willow and causes secondary drying cracks.
-
Clean the Fracture: Use compressed air or a soft wire brush to remove grass, dirt, and loose wood particles from inside the crack cavity.
Step 2: Adhesive Injection and Deep Penetration
Superficial glue application on the surface will fail on the first impact. The adhesive must coat every internal wood cell.
-
Flex the Gap Open: Gently pry the crack open by a fraction of a millimeter using your thumb or a thin shim—do not force it to the point of snapping.
-
Inject the Adhesive: Load your waterproof PVA glue or slow-cure epoxy into a blunt-needle syringe. Insert the tip deep into the base of the crack and inject adhesive until it overflows out of the seam.
-
Work the Joint: Repeatedly open and close the crack manually. This creates a vacuum effect that draws the liquid adhesive deep into the internal grain channels.
-
Wipe Excess: Clean off surface squeeze-out using a damp cloth for PVA glue or isopropyl alcohol for epoxy.
Step 3: Precision Clamping & Alignment
Improper clamping distorts the original blade geometry, leading to awkward ball bounces off the toe.
-
Prepare Sacrificial Shims: Place soft wood blocks or dense rubber pads on both sides of the bat face and edges. This prevents steel clamp jaws from leaving deep indentations in the willow.
-
Apply Pressure: Tighten bar clamps across the width or thickness of the repair.
-
Pressure Benchmark: Apply firm, steady pressure until a uniform line of glue squeezes out along the entire seam line. Do not overtighten to the point of crushing the soft willow fibers.
-
-
Cure Time: Allow the assembly to sit undisturbed at room temperature for at least 24 to 36 hours.
Step 4: Internal Dowel Reinforcing (Optional for Major Splits)
If the toe crack is extensive or has opened multiple times, adhesive alone may not withstand hard leather ball impacts. Installing internal hardwood pins adds mechanical shear resistance.
-
Mark Drill Locations: Mark two points perpendicular to the crack line, entering from the side edge or back face depending on crack orientation.
-
Drill Pilot Holes: Using a 3mm or 4mm wood bit, drill pilot holes across the crack line at a slight angle. Ensure you do not drill completely through the opposite side of the blade.
-
Insert Dowels: Coat 3mm–4mm birch or oak dowel pins with PVA glue and gently tap them into the pilot holes until fully seated.
-
Flush Cut: Once dry, cut off the protruding ends of the dowels using a flush-cut saw and sand flush to the blade surface.
Step 5: Sanding, Shaping, and Surface Profiling
Once the adhesive and dowels have cured completely, restore the toe to its original smooth profile.
-
Coarse Levelling (P80/P120): Sand away dried glue ridges and dowel ends using P80 grit paper, progressing quickly to P120. Always sand parallel to the wood grain direction to avoid deep cross-grain scratches.
-
Toe Rounding: Lightly bevel or round off the extreme bottom edges of the toe. A slightly rounded bottom edge deflects impact energy far better than a sharp, 90-degree square edge when digging out yorkers.
-
Fine Finishing (P240/P400): Finish the entire repair zone with fine grit paper until the seam feels perfectly smooth to the touch.
Step 6: Oiling, Sealing, and Protection
English Willow requires controlled moisture retention to remain flexible. A raw, exposed repair will dry out and crack again instantly.
-
Apply Raw Linseed Oil: Rub 1 teaspoon of raw linseed oil into the newly sanded toe region using a lint-free cloth. Leave the bat horizontal for 24 hours to absorb the oil. Do not over-oil, as excessive oil softens wood fibers and makes timber heavy and dead.
-
Apply Fiberglass Cross-Weave Tape: Wrap heavy-duty cross-weave fiberglass tape around the bottom 2 to 3 inches of the blade face, binding the repaired region horizontally. This locks the grain together under lateral impact.
-
Fit a Heavy-Duty Toe Guard:
-
Clean the very bottom surface of the toe with acetone to remove oil film.
-
Apply a thin layer of contact adhesive (e.g., Evode coat or Bostik) to both the bat toe and the rubber toe guard.
-
Allow the glue to become tacky (5 minutes), then press the guard firmly into position.
-
Wrap firmly with electrical tape for 12 hours to guarantee a tight seal.
-
Re-Knocking and Returning to Play
A freshly repaired bat must be reintroduced to ball impact gradually. Jumping straight into a match against new leather balls will ruin the repair.
Prevention: How to Stop Toe Cracks Before They Start
Fixing a crack is effective, but preventing damage keeps your bat performing at its peak.
-
Fit a Quality Toe Guard Immediately: Never play on grass pitches without a rubber or polyurethane toe guard. It acts as a moisture barrier and impact cushion.
-
Avoid Tapping the Bat Forcefully on Wet Pitch Creases: Bashing the toe against hard, wet ground drives water up into the vertical grain channels, weakening the wood from within.
-
Store Horizontally: Storing your bat vertically inside a bag allows condensation to collect in the toe. Always store the bat horizontally in a dry, temperature-controlled environment.
-
Pre-Season Preparation: Lightly oil and inspect the toe every spring. Catching a 0.5mm hairline crack early takes 5 minutes to seal; waiting until it splits open costs time, money, and performance.
Conclusion
Repairing a cricket bat toe crack requires patience, precise tools, and proper technique. By carefully diagnosing the depth of the damage, thoroughly cleaning the fracture, applying deep adhesive with controlled clamping, and adding structural reinforcements like dowels or fiberglass tape, you can fully restore a blade’s strength and playability.
-
Timely Action Saves Timber: Addressing minor hairline splits immediately prevents deep delamination and avoids costly professional re-toeing or complete bat replacement.
-
Proper Curing & Protection: Allowing adhesives to fully cure before re-shaping, oiling, and sealing with a quality toe guard ensures long-term resistance against both moisture and harsh yorker impacts.
-
Gradual Re-entry: Re-knocking the repaired zone with a mallet and testing it during net sessions guarantees the bond holds under pressure, giving you complete confidence when returning to competitive match play.
See More: Testing Cricket Bat Ping: Ball vs Mallet & Wood Density Guide